Sunday, 27 January 2013

McMug mug and camera advice?

Hello friends! The start of this new week brings warmer, albeit wetter, weather. It's definitely too early, but I am so ready for spring.
These were done to match my McMug mug (haha, works so well). McMug is a cartoon pig, popular in Hong Kong. While the drawings look very cute and children-oriented, the comics and films actually cover some more serious social topics. However, it's done in a very unique, and reflective kind of humour, that I think is what makes McMug so popular. I bought this mug five years ago when I was in Hong Kong, and I've used it all throughout university. It's such a happy mug!
I started off with two coats of OPI My Boyfriend Scales Walls as a blank canvas. Went out and bought a backup bottle of this because it's awesome and I realized I will use it a lot. On my thumb, I painted one coat of Illamasqua Milf on top. To keep the light, watercolour effect , I cut small pieces of makeup sponge and used them to dab on my colours.

First, I lightly dabbed some Sally Hansen Barracuda for the sky. I left it patchy, and went over areas that I wanted darker.  

Next, I outlined with black acrylic paint where I wanted the grass and my tree trunk to be. I used Illamasqua Milf again as a base for the grass. This let me refine my grass line if it was too thick, as the green just covers it. Then I sponged on some Sally Hansen Grass Slipper and Essie Mojito Madness. I used a thin brush to flick on blades of grass with Mojito Madness.

McMug was painted with a mix of skintone, red, and white acrylic paint. I did it my usual way of outlining first, and then filling in with colour.
Hope you enjoyed these! I really love them a lot!

Now, as the title suggests, I'd like to ask if any of you lovely people have any advice for me as to what good, solid camera I could buy. I want to be able to take better pictures, and maybe even start making video tutorials! I'd probably be willing to go up to around $1000. Any guidance you could give me, ie. brands, what you use yourself, what to look for, etc. is much appreciated! I just don't know where to start! Thank youuuuu!

Tuesday, 22 January 2013

If it ain't Baroque, don't fix it

Haha, classic. Today I have a Baroque-inspired pattern - I say inspired because I didn't do too much research before painting. I kind of just went for it. A random swirl here, dot there, leaf over here. I think they still turned out pretty (and probably took less time than if I had tried to painstakingly recreate a pattern), but they say more just vines to me than Baroque.
I started out with two coats of Essie Going Incognito. I CANNOT believe that this is only the second time I've ever used this colour. I mean, I remember liking it the first time, but I didn't remember it being such an amazingly rich and glossy and all-around gorgeous green! I am now seriously considering buying a backup bottle, I love it that much. I'd show you a swatch on its own, but I did these at a friend's house, so I didn't have my camera handy then. Next time!

The gold pattern is painted on with Zoya Ziv, another great polish. I used my regular medium length brush to draw the main path/shape of the swirl, then built onto it by thickening some parts and adding leafy extensions. I used a tiny dotting tool for the dots. Lesson learned: don't overdot. Too many dots makes it look cluttered.

Look, I was not lazy and actually did both hands this time!
What do you think, are these Baroque-y enough for you? You can really tell how much I know about the style, huh. Also, is it just me, or does gold look amazing with everything? I thought I loved turquoise and gold, but this combination is definitely giving some competition. Until next time!


Tuesday, 15 January 2013

More Japanese waves - just the tips

Today I have another version of a Japanese wave pattern. Originally I was thinking of doing the full pattern, but I thought it looked quite striking on just the tips, when I tried it out on my thumb. Also I wanted to show more of the pretty turquoise colour underneath.
I'd thought for a while if there was any good way I could do this with tape or something, to make the lines cleaner. I drew a blank, so I had to rely on my freehand abilities. It's definitely not perfect, but from a normal distance, they look pretty rocking to me.

Polishes:
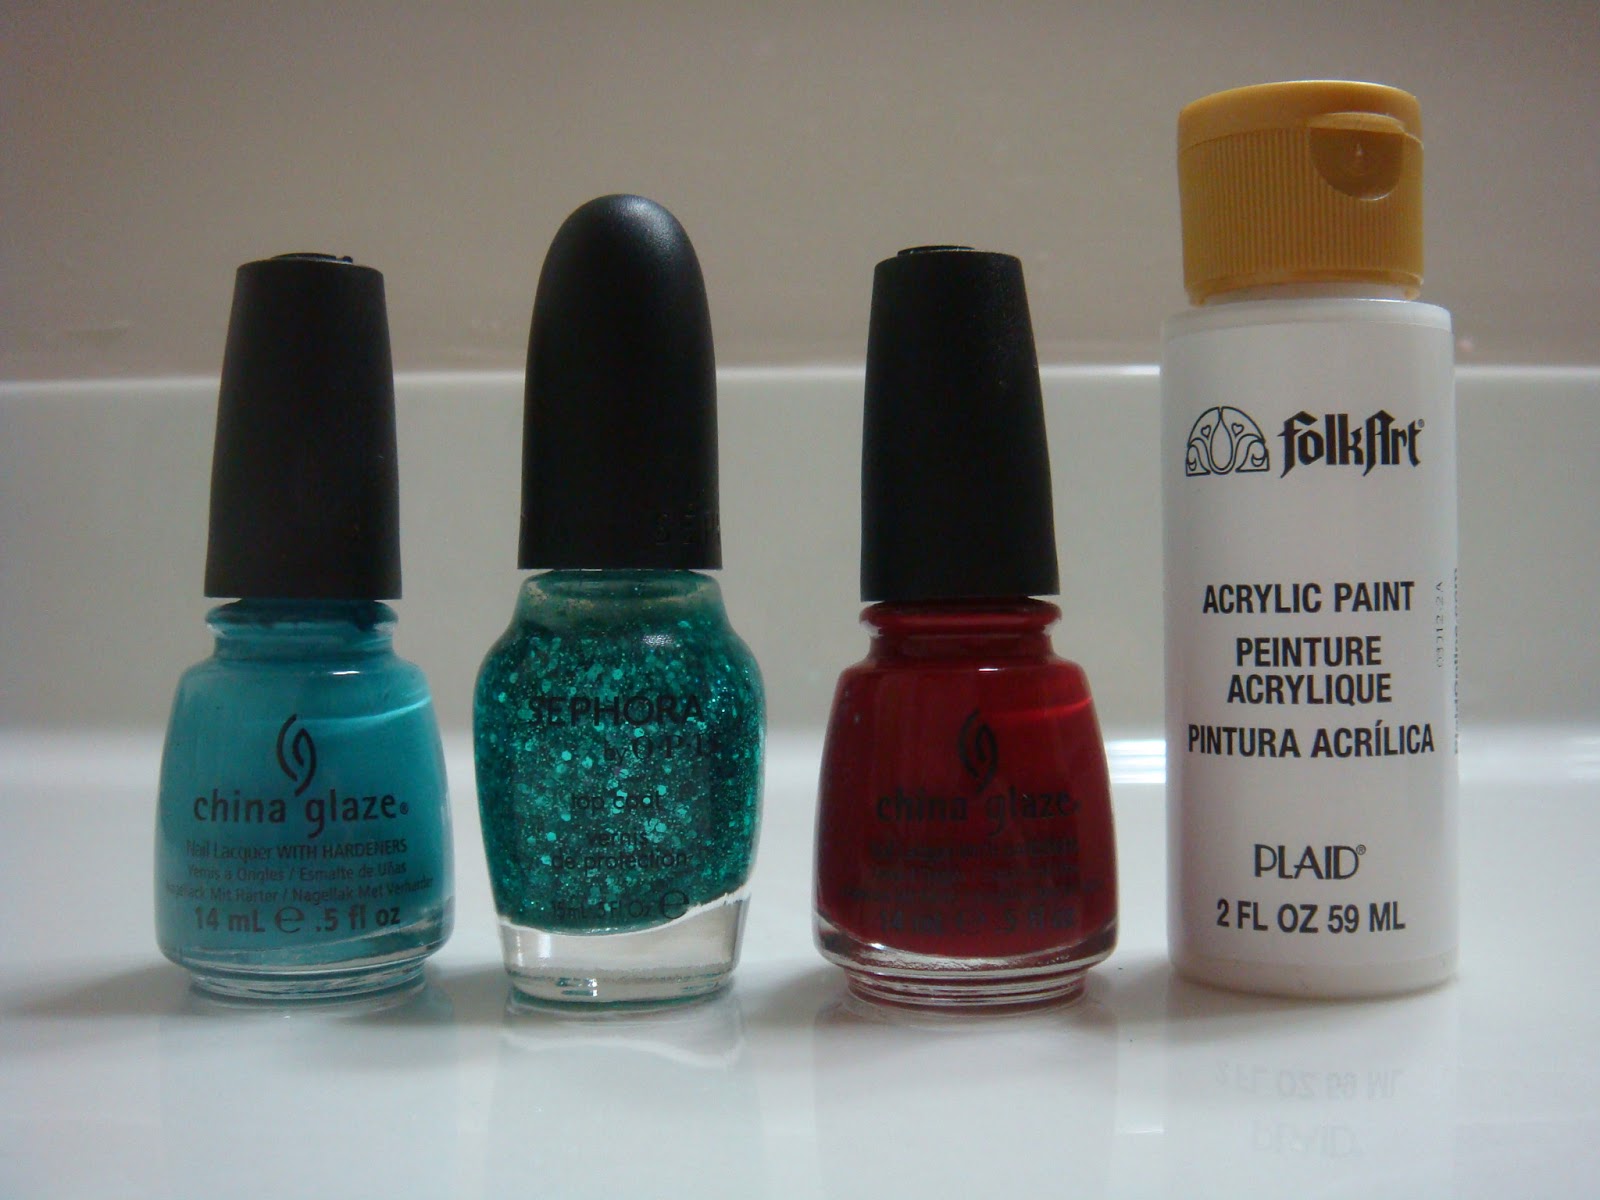
Left to right: China Glaze "Flyin' High", Sephora by OPI "Not Your Average Turquoise", China Glaze "Adventure Red-y, white acrylic paint
I painted 1-2 coats of Flyin' High, which I topped with Not Your Average Turquoise. Can I just say how pretty this glitter is? I imagine it can turn any blue into a glittery, underwater, magical wonderland. Then I went in with my medium length brush and painted the white semi-circles. I retraced the semi-circles with an even thinner brush in Adventure Red-y, trying my best to keep the red line centered along the white one. Last, I dotted the white dots with a bobby pin.    
Maybe next time I'll do the full pattern! Check out my other Japanese waves nails here. Until next time, friends!

Tuesday, 8 January 2013

The best pony

My Little Pony, My Little Pony, ah ah ah ah ahhhhh...

It was actually my brother that watched and introduced the show "My Little Pony: Friendship is Magic" to me. When he first told me the names of each pony, I couldn't stop laughing. Pinkie Pie? Twilight Sparkle?! They sound so ridiculously sweet, it's hilarious. I watched a couple episodes, and while I can't say I'm a true fan, I can see the appeal of this cute, colourful, and lighthearted show. I also watched enough to decide that Fluttershy is my favourite pony.


I started out with two coats each of OPI My Boyfriend Scales Walls on my thumb, OPI Sparrow Me The Drama on my index, China Glaze Gaga for Green on the middle, American Apparel American Denim on the ring, and OPI MBSW again on my pinky. For Fluttershy and her wings, I first painted the outlines with China Glaze Kalahari Kiss, and filled them in with China Glaze Lemon Fizz. The pink outlines of her mane is a mix of Zoya Reagan and OPI SMTD. I also used SMTD to fill in her mane. In retrospect, I should have used a lighter pink, but I think she looks quite pretty anyways! Her eye colour is Orly Green With Envy. I used the same colours I mentioned above for the designs on the rest of my fingers.
     
Short post today! This was a little too much to wear to the office, but it was fun while it lasted hahaa. Any fans of the show here?

Also, congratulations to Gini Kelly for winning my Christmas giveaway! Your China Glaze set should be on its way. Thank you all for entering and participating! I'll be sure to run more in the future so I can gift more of you lovely people <3 a Rafflecopter giveaway

Friday, 28 December 2012

Snowy days

Hello friends, I hope you all had a wonderful Christmas, and are enjoying your holidays! So we didn't exactly have a white Christmas, but it sure made up for it today. So much snow! It's only the beginning, and I already had a bit of trouble yesterday morning. My mom was driving me to the train station, and she swerved into a snow bank to avoid hitting a car in front of us. We were stuck. Luckily, no one was hurt, and thanks to the kindness of several passerby's that helped us clear the snow and push us out, I was able to make it to work only half an hour late.

While snow definitely adds some difficulty for us commuters, it can still be very pretty! I wanted to do a snowy manicure, and I knew exactly which glitter I wanted to do it with.
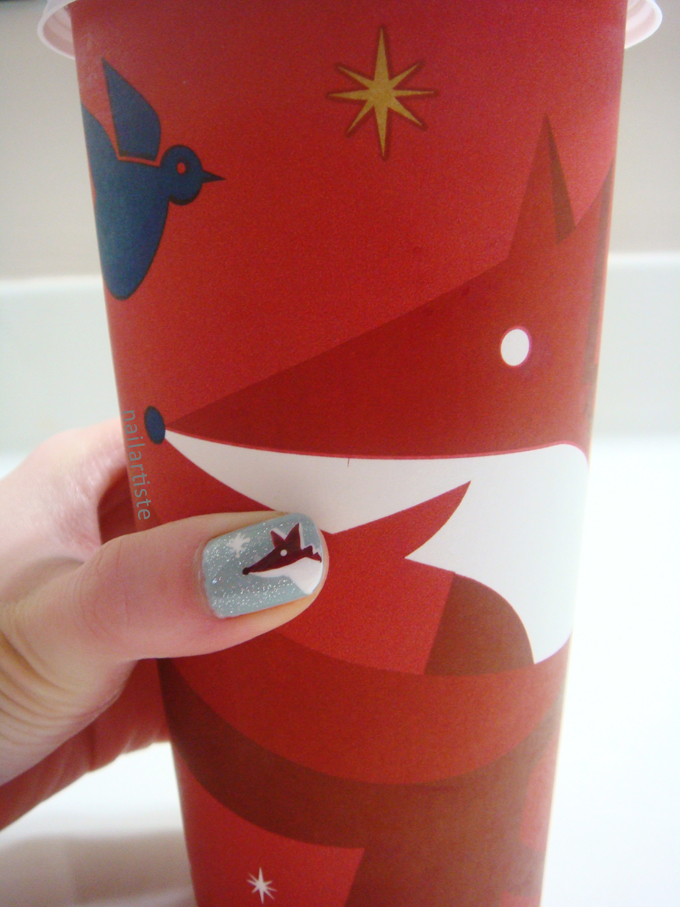
The base colour is Essie "Who Is The Boss", and the glitter is OPI "Pirouette My Whistle". It is so delicate and pretty, and simply perfect for a soft, snowflake effect. I painted the rabbit and the fox with acrylic paint.
Sorry about the dry hands. It was freaking freezing when I was taking these pictures - I ran in afterwards to slather cuticle cream and lotion on.
If these guys look familiar to you, it's probably because you've seen them on that cup holding your caramel brûlée latte (mmm yum). I always look forward to Starbucks' holiday drinks and cups, and I love the designs this year. The rabbit and fox are so cute!
Big fox, little fox
On my right hand, I did an accent nail with the Ciaté caviar kit my cousin gave me for my birthday. The silver is "Fit for a Queen", and the pearls are in the colour "Hologram". I didn't sprinkle the pearls on my nail fully, and I love the look so much.
I wore this over Christmas, but after one day, I was ready to take it off, because I couldn't stand having any more pearls falling off. Since I was going to remove it, I thought, why not experiment first and try putting some glitter and topcoat over it? Normally, you're not supposed to apply topcoat, as it'll cause the pearls to lose their colour. So I dabbed some China Glaze "Snow Globe" over top and THIS HAPPENED.
I LOVE this. The glitter over the silver and the pearls is insanely pretty. It looks like ice crystals, and as an added bonus, the pearls are now rock solid. I can go about using my hands without worrying about them falling off. I don't think I'll always get such a nice effect with other colours of pearls, though I'm willing to experiment.

So this turned out to be a really long post, and I need to go to bed. I'll definitely do a full Ciaté caviar post in the future. Hope you enjoyed these!

Friday, 21 December 2012

Christmas plaid and CUTE DOGGIE

Bwah! I'm alive! Between a final exam and getting into a new routine since I started a new job, I haven't had time to do anything nail-related, and I felt so sad about leaving my blog neglected for so long. But I'm back, my friends!

Since my last sparkly Christmas nails, I wanted MORE, and I couldn't get the idea of plaid out of my head, so I put the two together.
I painted a little Scottie on my accent nail because when I think of plaid, I think of Scotties. It reminds me so much of my cousins' Schnauzer, Pizza. He is the sweetest dog ever, and I haven't seen him since I was last in Hong Kong over four years ago. Miss him so much!
Pictures courtesy of my cousin - look at that face

Found a picture of him in plaid - too perfect

Polishes:
All China Glaze polishes this time!

Left to right: China Glaze "I Herd That", "Adventure Red-y", "Velvet Bow", "Kalahari Kiss", "Exotic Encounters"
I started off with two coats of I Herd That as the base. Then I used a thin brush to paint the thick red lines with Adventure Red-y. I painted little squares with Velvet Bow where the thick lines intersected. Then using a really thin striping brush, I painted in the thin lines with Kalahari Kiss first, and finally Exotic Encounters.
Hope you guys enjoyed this post, and a big hello to all you new followers here! Super happy to have you, and thank you for reading!

Thursday, 6 December 2012

Sparkly holiday nails with striping tape

After my first try with striping tape, while I liked the look, I was pretty sure I didn't want to subject myself to that experience again any time soon. But somehow, here we are. Whitney at Dressed Up Nails has definitely been an inspiration. She's done fantastic things with striping tape!
I began with two coats of China Glaze Prey Tell. It is the perfect, dark wine red shade that I've been craving. Then I laid down the tape, working one finger at a time, and painted a thick coat of China Glaze Twinkle Lights. It's a beautiful holiday colour, with tiny gold, red, and green glitters. I did my ring finger first as an accent, then my thumb, then ok I'll do my index too so they're kind of alternating, then what the heck, I'll just do my whole hand.
What I learned today: glitter looks best in natural light
I was a bit more adept in laying down the tape this time, but there were a few curse words along the way, and moments of wanting to bite and gnash the tape off with my teeth. BUT I love the end result so much, I'm sure I'll do something like this again. For the sake of my sanity though, I'm going to get thicker striping tape.

Reminder to my friends in Canada and the States to enter my holiday giveaway here!