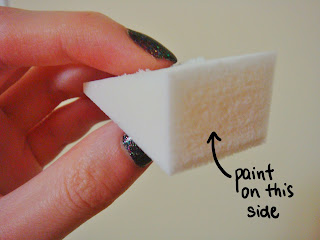
There are mainly two ways I use to create a gradient: brushing and layering on sheer polish, or stamping with a makeup sponge. Using a makeup sponge is my favourite way as it gives a smooth transition between colours.
General Tips for a Sponge Gradient
- choose pigmented, opaque colours
- paint a generous amount of polish on the sponge, since the sponge absorbs it
- don't be afraid to go over the gradient again if the colours are not opaque enough, or you missed some spots (but give the first layer some time to dry first)
- dab sparingly while blending the colours - the sponge already does most of the work, and you don't want to lift the paint off by dabbing too much
- you can use the same side of the sponge, as long as it's not overly saturated with polish, and the polish is not dry yet - I usually use one side for one hand, then switch to a fresh clean side for the other
- finish one hand and clean up with Q-tips (cotton swabs) around the nail before doing the other - it's easier to clean before the polish is completely dry
My colour choices for gradients don't always work out, but this one came out wonderfully. I wore this on vacation to San Diego and received many compliments for it!
Polishes:
 |
| Left to right: American Apparel "Malibu Green", OPI "No Room for the Blues", Sally Hansen "Blue Away", OPI "Last Friday Night" |
Materials:
 |
| A makeup sponge |
1) Paint stripes of your colours on the makeup sponge in the order you want them to show up on your nail.
 |
| This is how we do it at The Nail Artiste - hand-drawn pictures |
3) Repeat steps 1)-2) with other nails. Go over again any nails that are not opaque enough or have bald spots
4) Optional: add some sparkle. Here I brushed OPI "Last Friday Night" on two-thirds of my nail
5) Clean up with Q-tips and nail polish remover
6) Top coat over everything
 | ||||
| You're going to need a bit of cleanup |
Finished!
Have fun experimenting with different colours and combinations! I think I'll be doing gradients for a while to come...


Cool! I think I'm going to try gradients next :)
ReplyDeleteAwesome!! Hope you'll love them as much as I do!
ReplyDeleteI love how well the colours go together! Reminds me of light under waters. So beautiful!
ReplyDeleteThank you!! I had to wear these to the beach, since they reminded me so much of the ocean.
DeleteBy the way, you have a lovely blog yourself!